

J.F.Drew © 2000-2017


Mobile menus
VK5DJ
PICkit 3 interface
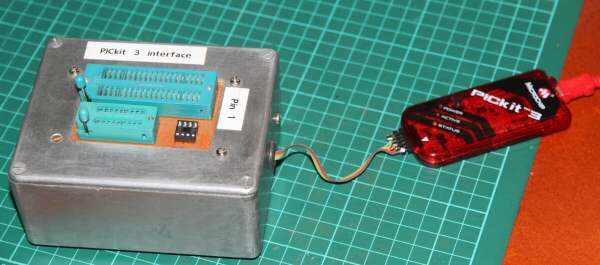
The PICkit3 is available from MicrochipDirect for about AUS$50. It will program any PIC® device providing that you interface to the chip correctly. I use the free MPLAB V8.92
The PICkit3 comes with a supplied USB lead while at the business end it has a 6 pin socket that takes standard 0.1” spaced pins. I used standard PCB section broken off at 6 pins and I directly soldered to the pins with a short length of ribbon cable. I used pins 1-5 only as I do not use low voltage programming.
I chose a cast aluminium box and cut a 70*45 mm rectangular hole in the cover and added adhesive rubber feet to the bottom of the box.
Into the hole I bolted a 60 * 95 mm piece of vero board and soldered in three sockets. An 80 pin ZIF, a 18 pin ZIF and an 8 pin socket. The Vdd pins were connected together and then to pin 2 of the PICkit3, similarly the Vss pins were jumpered together and joined to pin 3 of the PICkit3. In similar fashion the MCLR pins went to pin 1, the PGC pins to pin 5 and finally the PGD pins to pin 4 of the PICkit3.
A 4K7 resistor was soldered between MCLR and Vdd on the 40 pin socket.
Obviously the copper was cut in appropriate places under the vero board to isolate each socket from the others.
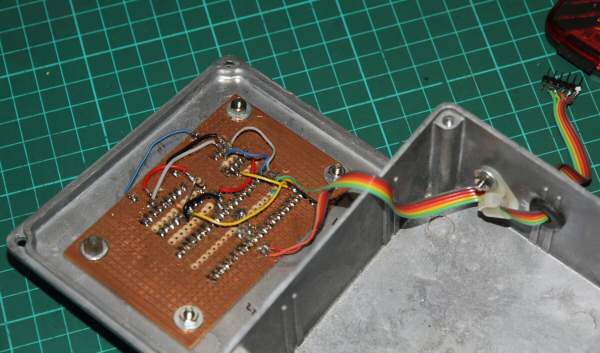
This shows the underview. It’s not exactly tidy but it works reliably.
I also made up a second cable, one end wired for the PICkit3 and the other wired to a socket so that it could be plugged into appropriately wired boards that use ICSP enabling programming of PIC® devices already soldered to a board.
It is possible to just wire a 40 pin socket and then carefully place smaller PIC® devices so that the appropriate pins made contact. I find this prone to error and as I usually use 18pin and 40 pin PIC® this was the best solution.
| Repeater features |
| Solar version |
| 1750Hz decoder |
| Record and playback |
| Voice interface |
| Micor solution |
| Yagi Calculator |
| RD Contest logger |
| Moon Tracking |
| Orbitron interface |
| PRFCalc |
| TAIT programming |
| Proton Development Suite |
| Old crystals for radios |
| Compound interest |
| Yagi photos |
| Bird proofing |
| Bender |
| VK5DJ downloads |
| VK3UM downloads |
| Site map |